
2019 Updates: Since publishing this recipe, I’ve made a few tweaks. I’ve increased the Cheeto quantity (a frequent request), slightly reduced the pretzel quantity, and learned how to gently speed up roasting time. I’ve also received questions about what a “big” bottle of Worcestershire sauce is, so I’ve tried to clarify below. Amusingly, I just received a gift of a very old Merry Mix recipe card my father once gave to my brother. I can tell it’s old because it uses only one kind of Chex, no Cheez-Its, only 3/4 cup butter, and a paltry 2 tablespoons Worcestershire sauce (gasp!). Also, all the seasonings were salts (celery salt, garlic salt, etc.). I’ve verified with Papa that he makes his Merry Mix the way I describe below now, and it’s how I’ve been making it for years. What can I say? Never stop improving.
——
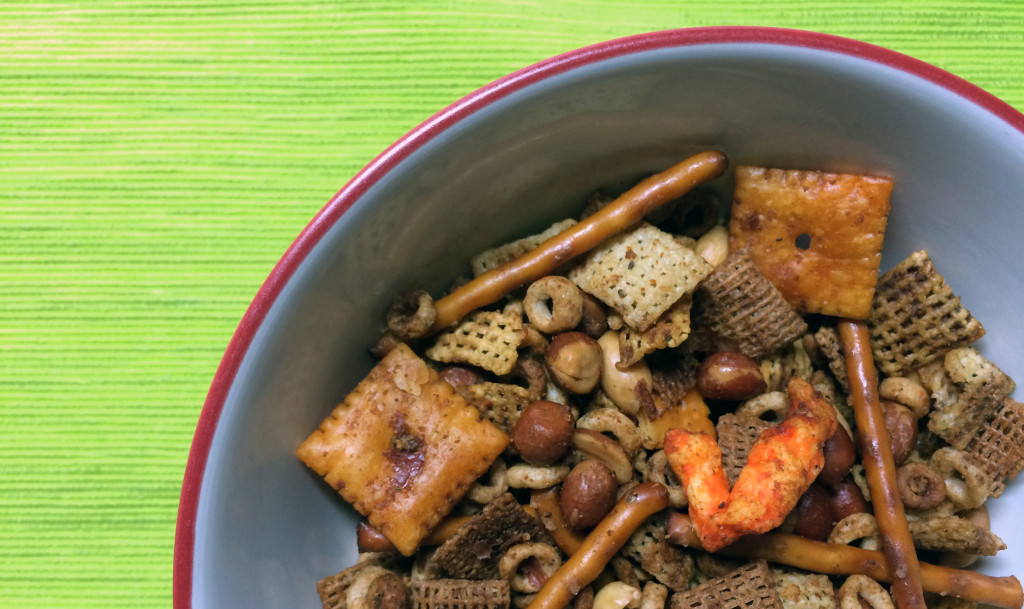
As far back as I can remember, my Papa involved me in cooking projects. He’d arm me with a paring knife so I could help prep, or he’d drag a chair to the stove so I could stir. I loved squishing meatball mixture through my tiny, chubby fingers. I got really good at pleating gyoza. One of the all-time favorite recipes we made as a family was Merry Mix.
He’d pull out the enormous, commercial-kitchen-size stainless-steel mixing bowl and plunk it on the table. (When I say this bowl was enormous, please understand I could sit in it and sled down a hill. And I did. We had to take all the racks out of our oven and bake it with the door slightly ajar because it scarcely fit.) I’d open all the bags and boxes and dump everything in, mixing gently with my hands.
Papa always claimed Merry Mix was “an old Moore family recipe,” but I know he’s modified it over the years. I think his original recipe was inspired by a Nalley’s snack mix from his youth. In the ’80s, we sometimes included Bugles. My brother, Matthew, has had good success experimenting with new ingredients, including one notable version using wasabi peas. I tend to make it with the same ingredients every year, just as we did in that giant steel bowl when I was really little, but I have some suggested modifications down below in the notes.
Oh, and don’t make the mistake of calling this Chex Mix. The “Official” (barf) “Original” (lies) Chex Mix recipe from General Mills doesn’t call for nearly enough flavoring agents and it leaves you with half a dozen partially eaten boxes of cereal and snacks (hisssss). Merry Mix completely eliminates the waste and most of the measurement required in the corporate-sanctioned recipe. It goes like this:
- Use the whole box/bag of each component. Why have leftovers?
- Use a whole pound of butter (melted). Yeah. Four sticks.
- Use a whole bottle of Worcestershire sauce (the biggest bottle you can find)—maybe even more—because it’s delicious.
- Use plenty of seasonings (granulated garlic, granulated onion, celery seed, paprika—optionally, seasoned salt of your choosing).
- Bake on low heat (250ºF) until even the most saturated pieces are crispy and dry.
- Approximately every 30 minutes while the Merry Mix bakes, gently fold the mixture with a wide, flat spatula, coming in from the edge of the baking dish to avoid breakage. This accelerates the drying process and prevents burning at the edges.
Yes, it takes forever. Yes, your house will smell absolutely amazing. Yes, the yield is a little more than three gallons. Yes, you may have to use multiple baking dishes to contain all of the magic. It’s worth it.
The recipe can easily be modified to be gluten-free (leave out any ingredients that contain wheat—Wheat Chex, pretzels, Cheez-Its, some brands of Worcestershire).
In my house, Merry Mix is a Christmas necessity. Merry Mix is a great thing to make in the fall/winter when houseguests are plentiful, but it also makes a killer road trip snack in the summer. I hope you’ll give Merry Mix a try (please tell me if you do!). You won’t regret it.
Merry Mix
Active time: 15 minutes | Total time: 3 to 8 hours | Yield: ~3.5 gallons
Ingredients
One normal-size box Rice Chex
One normal-size. box Corn Chex
One normal-size box Wheat Chex (omit for gluten-free mix)
One normal-size box Cheerios
Two normal-size bags Crunchy Cheetos (if desired, try swapping one bag with Flamin’ Hot)
Approx. 14 oz. pretzel sticks (see note below if using gluten-free pretzels)
One normal-size box Cheez-Its (omit for gluten-free mix)
One canister Spanish peanuts (red-skinned)
1 lb. salted butter
10 to 15 oz. Worcestershire sauce (you cannot go wrong increasing this amount)
1 TBSP. granulated garlic
1 TBSP. granulated onion
2 to 3 tsp. ground celery seed
2 tsp. paprika
Seasoned salt (such as Lawry’s or Johnny’s), to taste, if needed
Instructions
-
-
- Preheat oven to 250ºF. Toss all cereals and snacks into a very large vessel or two for mixing. (Those aluminum foil roasting pans from the grocery store work well.) Using your hands, toss gently to combine.
- Melt butter. Stir the dry spices together in a small dish.
- In three to four additions, top mixture with the melted butter, several liberal glugs of Worcestershire, and a generous pinch of the spices, stirring gently to combine between additions. Continue until you run out of wet ingredients and spices. Taste, and if it needs more of any of the spices, sprinkle a bit extra on or add some seasoned salt (Worcestershire sauce varies in saltiness, as will your dry ingredients).
- Spread the now-wet mixture into as many baking vessels as your oven will hold. A shallower vessel (such as a baking sheet) roasts much faster than a deep vessel (such as a roasting pan). The downsides of using shallow vessels is you’ll need to stir more frequently to avoid burning, and folding the mixture can be precarious. These days, I’m doing a half-batch of Merry Mix at a time and that fits on two half-sheet pans (rimmed baking sheets).
- Bake in oven, folding gently with a wide spatula to bring the wetter ingredients at the bottom of the pan up to the top every 30 minutes. Merry Mix is done when all pieces are dry and crisp, which will take less time in shallow dishes than it does with deep ones. A half batch baked on two baking sheets takes about three hours. A full batch in roasting pans could take as long as eight hours. You’ll have to taste some of the most well-saturated pieces to be sure. Note that one pan may finish faster than the other. Allow to cool completely, then store in gallon-sized zip-top bags.
-
Notes:
- Optional mix-ins: Crispix cereal, mixed nuts, Goldfish or Bunnies crackers, pretzel Goldfish or teeeeeny twists in place of pretzel sticks, wasabi peas, sesame sticks, broken pita or bagel chips, Fritos, Bugles, red pepper hot sauce (such as Frank’s Red Hot). If you add a bunch of extra stuff, think about leaving something else out to compensate (or increasing the butter/Worcestershire/seasonings and loving your life).
- Gluten-free modifications: Omit all ingredients that contain wheat and check your Worcestershire sauce) and consider increasing other Chex quantity (or adding other mix-ins) to compensate for loss of bulk. If substituting with GF pretzels, wait to add them until after the mix has baked and cooled. I’ve read that, due to their composition, GF pretzels do not hydrate and crisp up again the same way traditional pretzels do.
- What’s a box/bag/bottle/canister?: I didn’t note a size for the cereal boxes, Cheetos bags, or even peanuts canister. That’s because sizes vary within stores, brands, and regions. The goal here is ease and the recipe is flexible. In general, if you have a choice, use the “normal” box for all the cereals, not the giant “family size” boxes. For the Worcestershire sauce, that’s personal preference. I like to use the largest bottle that Lea & Perrins makes (which in my area is 15 ounces), but sometimes I can’t find it so I use one-and-a-half 10-ounce bottles. I’ve used smaller bottles before from all sorts of other brands (like Whole Foods’ 365 or Annie’s or Kroger’s) and the Merry Mix has come out fine. If you dig Worcestershire like I do, get the bigger bottle (or a couple of littler ones).
- Think of your vegetarian friends: Some Worcestershire sauce, such as Lea & Perrins, is not vegetarian because it contains anchovies. If you’re feeding any vegetarians, use an appropriate bottle of Worcestershire sauce so they can partake (or at least warn them so they can make an informed choice). Many inexpensive grocery-store house brands are vegetarian.
I was the best Bluebird in my troop, at least when it came to candy sales. I don’t remember most of what I did as a Bluebird, but I have vivid memories of shilling treats, the awards I earned for my sales numbers, and the resulting “jamboree” I got to attend. Some people grow up as a Boy Scout or a Girl Scout, but I was a Camp Fire Kid. Every January, we sold a variety of treats (our big sellers were mint patties, some turtle clusters, and Almond Roca), door-to-door or seated at a card table in front of the local grocery store. My parents—either genius or negligent—allowed me to peddle my goods during a snowstorm, which led to extremely high sales and a staggering quantity of hot chocolate in my belly.
But I also pulled a shift at the Safeway down the street, where I attempted to convince a passerby that she needed some candy. “Oh no, thank you, I couldn’t,” she said. “Have you ever tried Almond Roca? It’s really, really good,” I replied, attempting to appeal to her sense of culinary adventure. “Oh, it’s delicious…” “It’s only $3 a box! Or two for $5!”
“Yes, but if I buy them, then I’ll eat them.”
I’ll never forget that reply. As a child, I was completely baffled. Yes, of course you would eat the food that you bought. Why wouldn’t you? It was only later that I realized she meant that delicious Almond Roca would be too great a test of her self-control, and she’d find herself sneakily unwrapping those toffee bricks while no one was looking, perhaps hiding the wrappers beneath other rubbish in the trash can so as not to be confronted with evidence of her own gluttony.
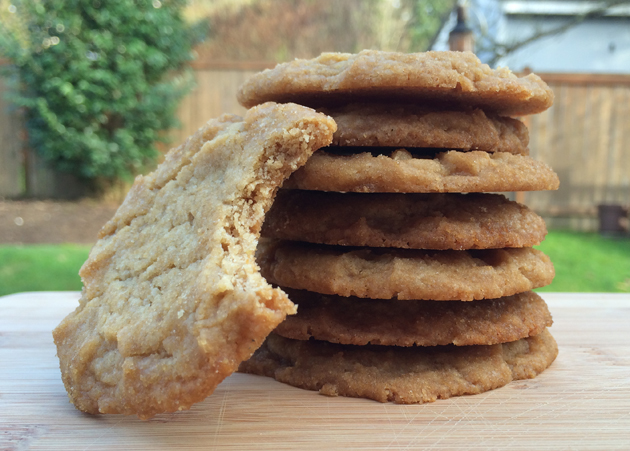
You guys, I’m gonna be straight with you: If you bake these cookies, you will eat them. You will probably eat an undignified number of them, right in a row. And if you’re anything like me, you won’t mind one bit. You didn’t bake cookies just so you could stare at them. You baked cookies so you could enjoy sweetness, caramel notes, and unbeatable chewiness. Maybe you baked them because you wanted something with which to make the perfect ice cream sandwiches. Maybe you just wanted to make someone fall in love with you. These are all good reasons to make these cookies.
Oh, did I mention they’re incredibly simple?
Chewy Salted Butterscotchies
Active time: 20 minutes | Total time: 2 hours | Yield: 26 cookies
Ingredients
1 1/2 cup packed dark brown sugar, plus more for rolling
1 cup (2 sticks) unsalted butter, cut into several pieces
1 large egg
2 teaspoons vanilla extract
2 cups all-purpose flour
1 teaspoon baking powder
3/4 teaspoon fine salt
1/2 teaspoon baking soda
Instructions
- Place sugar in a mixing bowl and set aside. In a heavy-bottomed saucepan or skillet (not nonstick), melt butter over medium heat, stirring occasionally. Once butter melts and starts to foam, stir continuously until foam starts to subside. When the flecks on the bottom of the pan begin to brown and butter smells nutty, remove from heat.
- Quickly pour browned butter on top of sugar and stir to combine (note that sugar will not entirely absorb all the melted butter). Stir in egg and vanilla until combined, then add flour, baking powder, salt, and baking soda. Stir until well-blended. Refrigerate 1 hour.
- Preheat oven to 350ºF and line a baking sheet with parchment or a silicone baking mat. With a 1 1/2 tablespoon scoop, portion dough into balls, roll in your hands to smooth, and roll in brown sugar. Place 9 balls on sheet, flatten to 1/2-inch thick, and bake 10 minutes. Let cool on sheet 5 minutes, than transfer to wire rack to cool completely. Repeat with remaining dough balls. Once cooled, store cookies in an airtight container. They’ll probably last 4 or 5 days if you don’t eat them first.
Last year, when I got a SodaStream, I started mixing various juices with seltzer to make fruity spritzers. A favorite in this house is equal parts apple cider and seltzer with a couple spoonfuls of ginger ale syrup. It’s autumn in a glass.
But I’m fussy about my fruits; I won’t eat apples out of season. As soon as the trees stop producing, I cut off my daily apple consumption, and that includes putting the kibosh on buying jugs of cider. I really make the most of my fall cider purchases, and I once experimented with cooking it down to make a syrup for Saturday-morning pancakes. I had some leftover and I stirred it into soda water. What wizardry had I unlocked?
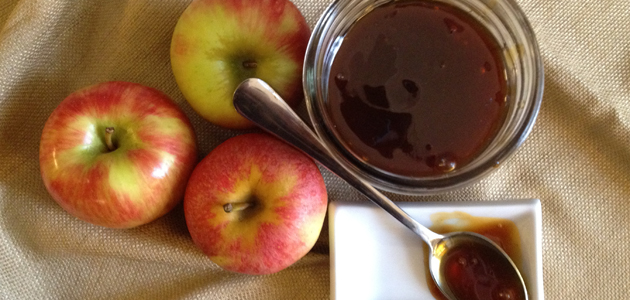
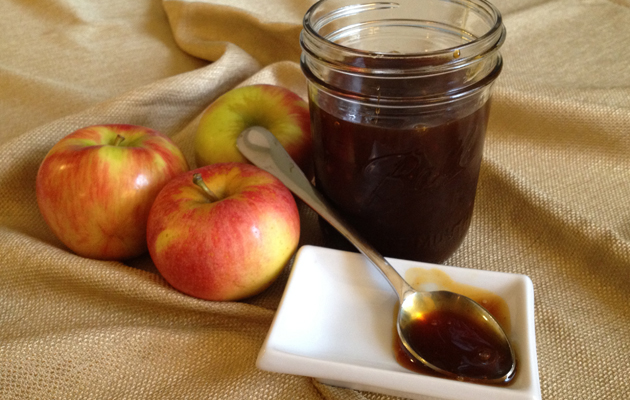
Nothing my ancestors hadn’t already well-documented, it turns out, but it’s a treasure all the same. It turns out that Colonial New Englanders—no slouches in the department of preserving the harvest—knew exactly how to extend the delicious, tangy joy of cider so that it could last year-round. By cooking cider down, reducing it to one-seventh its original volume, you concentrate the sugars, capture the sweet-tart nature of the juice, and make something that lasts at least a year if refrigerated (though I’m sure our Colonial predecessors didn’t worry about that last part). With apples being as plentiful as they were, boiled cider was one of the cheapest sweeteners available (not to mention the tastiest).
This recipe falls in the “set it and forget it” category. It involves no complicated appliances, only a single ingredient, and nothing but a little time in the house. Simply put, boiled cider (or apple cider molasses, or cider syrup) is fresh apple cider that is cooked down until thick and syrupy. That’s it. There’s no trick to it, it’s just a simple trick.
Now, why would you want to do this? Aside from the fact that it makes your house smell incredible (and seriously, I mean incredible), the resulting syrup has a number of applications both savory and sweet.
- Stir it into seltzer for an awesome soda treat long after the apple harvest (apple soda in May!).
- Add it to boiling water to make hot cider after a long wintry walk.
- Brush it on raw bacon strips and roast for a candied bacon that’s out of this world.
- Mix it into the dough for baked goods, like scones, cake, and donuts, to add cider flavor and cut refined sugar.
- Toss apples with it to bake in a pie. If you want to blow someone’s balls off with the awesome appletude of your pie, do this. Trust me.
- Warm it and drizzle it over ice cream (pumpkin ice cream is a particular treat).
- Add a bit to your baked beans.
- Swirl it in your morning oatmeal or yogurt.
- Glaze roasted squash or carrots.
- Whisk it into a vinaigrette.
- Put it on pancakes in place of maple syrup.
- Spread it on buttered toast.
- Make a PB & boiled cider sandwich. Vow to never use ordinary jelly again.
- Glaze ham or chicken.
- Add some to a gravy for pork.
- Stir into hot tea.
- Add to cocktails (rum, whiskey, brandy).
- Use it to make BBQ sauce.
- Stir it into cream cheese and put it on a bagel or a slice of pumpkin bread.
Are you excited yet?
Boiled Cider / Apple Cider Molasses / Cider Syrup
Active time: 10 minutes | Total time: 3 1/2 to 5 hours | Yield: approximately 2 1/4 cups
Ingredients
1 gallon fresh apple cider
Instructions
- In a clean, nonreactive pot, add 2 1/4 cups cider. Stick a skewer into liquid and mark the height by drawing on skewer with a pen or wrapping it with a rubber band. This will be the way you measure how much the cider has reduced (2 1/4 cups is approximately 1/7 of a gallon). Add the rest of the cider and heat over medium-high. (If desired, add spices at this time.) After 30 to 45 minutes, use a spoon to skim off any foam around the edges.
- Keep cider at a rapid simmer for 3 1/2 to 5 hours. Every hour, stick a second, clean skewer in the pot, take note of the height of the liquid and compare it to your marked skewer.
- When the level of cider is near the mark on your skewer, stir every 5 to 10 minutes, making sure liquid does not bubble over. When it has reduced to 1/7 original volume (it should coat the back of a spoon and be the consistency of warm maple syrup), remove from heat and pour into a clean glass jar (if you wish, strain it through a fine-mesh sieve first). Let cool to room temperature, seal, and refrigerate, up to 1 year.
A note about spices: Traditionally, boiled cider is made without any additional flavorings, as spices can muddy the flavor and also turn the syrup an unsightly color during the long cook time. If you want to add spices, try 1 cinnamon stick, 9 peppercorns, a few allspice berries, 2 whole cloves. Remove spices after 2 hours to prevent overconcentrating their flavor.
A note about reducing too much: If you boil your syrup too long, don’t panic. Apples contain a ton of pectin, which is what makes fruit jell, so if you overboil your syrup you just get cider jelly! You can either keep it that way (and usually, I do—the applications for the jelly are almost identical to the regular, more liquidy boiled cider, and it’s even better for putting on bread or PB sandos) or add a little water and thin it back out a tad.

The other day, I posted this on Facebook: Fact: Taco salad is the best salad. Not a single person dissented; many agreed quite vocally. Seriously, what’s not to love? Taco salad can feel somewhat virtuous (though frequently it’s far from it), it’s a little more kicky than your usual garden greens, and it’s fairly customizable. One complaint I often hear about eating salad for lunch is that you wind up hungry by 3pm. Not so with a taco salad! There’s so much happening in there, so many good, filling ingredients, that you’ll be satisfied till supper.
When I was growing up, we’d often have taco salad for dinner. Matthew and I loved this meal and happily ate it out of an enormous salad bowl in which Papa tossed everything together, but if you have fussy little ones, it’s easy to do individual plates of taco salad, omitting the undesirable ingredients as needed. Feeding a crowd? For heaven’s sake, make a taco salad! I’ve yet to meet a person who was not delighted by the appearance of a bowl of these Mexi-ish greens.
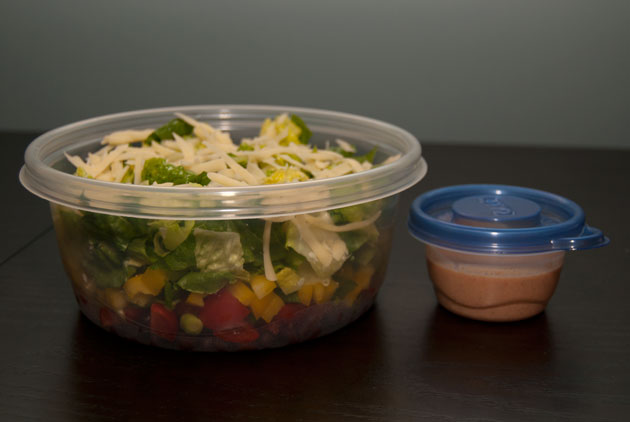
I was a vegetarian for about half my life, so I typically make this salad without any meat, but you can add in whatever you like. My Papa used to cook up seasoned ground beef to toss in, and if I like to make Mike really happy, I’ll sometimes grill up a marinated chicken breast to shred. But even without meat, it’s plenty filling and quick to make. Perhaps best of all, you can pack it for lunch (even pack it days before) and have the best lunch ever at the office. Below is my recipe to feed a family of four, but below the main recipe I have included tips and quantities for making two lunch-size portions (and how to pack them). I usually prep 2 dinner salads in big bowls and make leftover lunch salads at the same time with the full 4-serving quantities.
Basic Taco Salad
Active time: 20 minutes | Total time: 20 minutes | Serves: 4
Ingredients
6 tablespoons sour cream
6 tablespoons fresh salsa
3 tablespoons chili sauce (we like Heinz)
1/2 teaspoon chili powder
1/4 teaspoon cumin
1/4 teaspoon onion powder
Tabasco Green Jalapeño Pepper Sauce
Salt and pepper
12 to 16 ounces romaine lettuce, chopped
2 cans (15.5 ounces each) black or small pink beans (pinquitos), rinsed and drained
1 pint grape or cherry tomatoes, halved (or 2 medium tomatoes, diced)
kernels from 2 cobs of corn (or 1 1/2 cups frozen corn kernels, thawed)
1 large bell pepper, diced
4 scallions, sliced (or 1/2 white onion, diced)
1 1/2 cups shredded cheddar, Colby Jack, or Monterey Jack cheese (6 ounces)
4 handfuls tortilla chips, lightly crushed into bite-size pieces
cooked taco meat or shredded cooked chicken breast, diced avocado, sliced black olives, cilantro leaves, toasted pepitas (optional)
Instructions
- In a small bowl, stir together sour cream, salsa, chili sauce, cumin, and onion powder. Season to taste with Tabasco, salt, and pepper.
- In a large bowl, toss together lettuce, beans, tomatoes, corn, bell pepper, scallions, cheese, and dressing (along with any optional mix-ins). Divide among four plates and top with crushed chips.
For two lunch servings (note reduced quantities):
In a small bowl, stir together 3 tablespoons sour cream; 3 tablespoons fresh salsa; 1.5 tablespoons chili sauce; 1/4 teaspoon chili powder; 1/8 teaspoon cumin; and 1/8 teaspoon onion powder. Season with Tabasco Green Jalapeño Pepper Sauce, salt, and pepper to taste. Divide the dressing between two 4- or 6-cup storage containers with tight-fitting lids (we use yogurt tubs). Splitting quantities between the two containers, layer the following items in this order to prevent sogginess: a handful of diced tomatoes (about 6 grape tomatoes per container); 1 can of black beans, rinsed and drained; kernels from 1 cob of corn (or 3/4 cup frozen corn kernels, thawed); 1/2 yellow bell pepper, diced; 2 scallions, sliced; 1/2 pound romaine lettuce, shredded (about 4 handfuls per container); 3/4 cup shredded cheese (3 ounces). Cheese always goes on top! In a small bag, pack a handful of chips (don’t worry about them getting crushed; you’ll be crushing them shortly anyway). Refrigerate. At lunchtime, shake like the dickens or toss in a bowl with crumbled chips. Enjoy the envious stares. [Note: The photo below shows the dressing kept separate, which you can also do. I just don’t have tiny containers like that anymore and I learned it’ll do fine in the base of your 4-cup container!]
Notes:
- You can substitute Greek yogurt for the sour cream, if you like.
- If you choose to include avocado in your make-ahead salad (I like to), dice it and toss it with some lime juice, then put it on the very bottom of your lunch container before you add the dressing. The dressing will blanket the avocado to protect it from the oxygen/keep it from browning.
- If you put shredded chicken in your lunch salad, pack it on top of the lettuce, like the cheese (ground meat can go on the bottom).
This is a recipe I knew before I met Heather and, had she not been a strict vegetarian at the time, one that I no doubt would have made to woo her. It’s delicious, impressive, and very easy to prepare. If you make this for the lady or gentleman of your fancy, it could very well result in after dinner sexytimes. I make no promises, but your odds are definitely improved.
In the past, I have enjoyed this dish on a bed or angel hair pasta (with a simple garlic butter sauce), but it plays well with a myriad sides. Last night, I served it with my roasted broccoli, but it also goes very well with roasted brussels sprouts, steamed or sautéed green beans, peas, mashed potatoes, or any combination thereof. Note that I have made the recipe for two, but it scales up perfectly to serve however many people you prefer.
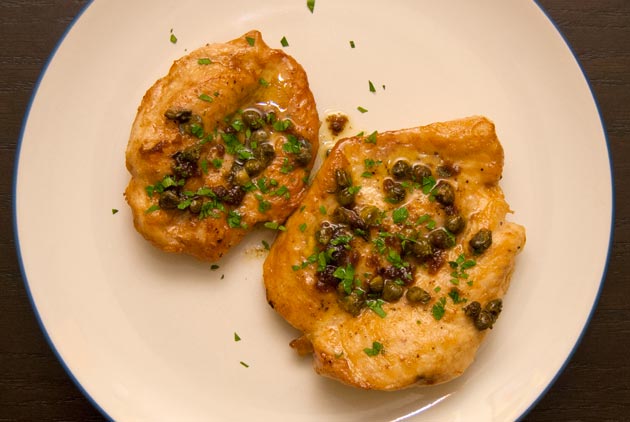
Chicken Piccata
Active time: 20 minutes | Total time: 20 minutes | Serves: 2
Ingredients
1 boneless, skinless chicken breast, halved horizontally (to make two thinner fillets)
1/4 cup all-purpose flour
salt and fresh ground pepper
3 tablespoons unsalted butter
2 1/2 tablespoons extra-virgin olive oil
1/4 cup chicken broth
1 lemon, juiced (about 2 tablespoons)
2 1/2 tablespoons brined capers, rinsed and drained
2 1/2 tablespoons fresh parsley, chopped (this is mostly garnish, so chop more or less to taste)
Instructions
- Season the chicken filets with salt and pepper (both sides) and dredge them in flour. Shake them off, but don’t go nuts; that extra flour will come in handy later when you scrape the pan to make the sauce.
- Add 1 tbsp of butter and 1 1/2 tbsp of olive oil to a large skillet over medium heat. When it starts to sizzle, add the chicken, cooking each side for about 3 minutes. Remove and set aside.
- Add the chicken broth, lemon juice, and capers. Bring to a boil, stirring and scraping the pan to get all of those nice, flavorful brown crispy bits. Put the chicken back in the pan, then reduce the heat and let everything simmer for about 5 minutes.
- By now the chicken should be a nice golden brown and everything should smell capery and buttery and awesome. Plate the chicken, then add the remaining butter to the pan. Scrape it around again and whisk everything together until it begins to thicken. Pour the sauce over the chicken, sprinkle the parsley on top, and serve.
Notes
- Get the most juice from your lemon by microwaving it for about 20 seconds. Then, roll it on the counter until it is noticeably softer. This helps burst the the little juice cells inside which makes the juicing easier and yields the most liquid.
- You a regular skillet (vs. non-stick). Otherwise, you won’t get those brown crispy bits that add extra flavor. Don’t worry; because of the oil and butter, the meat sticking to the pan is not an issue.
- Because we’re dealing with hot oil, butter, and chicken juices, I like to use a splatter screen. Of course this is totally optional, but I am a kitchen neatnik and mine has served me very well.
 Confession: Hot dogs are directly responsible for me quitting vegetarianism after more than 15 years. You guys, I love hot dogs. My brother, Matthew, and I used to split a package of Lit’l Smokies when we came home from school (for the record, that’s four servings each; it’s a miracle we’re not dead). I like a hot dog off the grill, I like a boiled dog, I like a dog charred in the flames of a campfire, I like sliced dogs stirred into stovetop mac and cheese, I like pigs in a blanket…I even like tofu dogs, but when I was faced with a hot dog at my first Mets game in Shea Stadium, I folded like a cheap suit. Folks at my old magazine caught wind and asked if I’d eat meat for a week and write about it. The rest is history. Sweet sweet sustainably-and-humanely raised animal-eating history.
Truly, I don’t eat much meat these days, particularly red meat, but I just can’t resist a hot dog. That said, I had never known the glory of a Chicago-style dog until I moved East, and once my eyes were opened, they were opened wide. Now, I’m a fan of condiments. The more, the merrier, I say. I like my burgers overflowing with stuff. I’m the guy at Subway who orders a sandwich “with everything. No, seriously, all of it.” A Chicago dog speaks to this innate need for a well-dressed weenie. In the Chicago style, when a beef dog is “dragged through the garden,” it’s placed in a steamed poppyseed bun and topped with yellow mustard, pickle relish, a dill pickle spear, fresh tomato, pickled sport peppers, diced white onions, and celery salt. Sometimes, a cucumber slice or two are added; the occasional inclusion of ketchup is a hotly contested issue. This colorful dressing takes a simple dog and elevates it to a full, colorful meal.
There’s one problem: Chicago dogs are messy, y’all. The tomatoes always end up slapping against my nostrils, the onions fall off, and the sport peppers, when they’re not squirting spicy brine, are torpedoing out the tail end of the bun. We make these babies fairly frequently in our house, so I’ve been tinkering with the method. Boiled dogs are fine, but Mike prefers ’em grilled (“chardog”), so I’d been splitting them in half and slapping them on our Griddler. They curl up like crazy, though, and the charring isn’t that fantastic. I also often eliminate the sport peppers because they’re a bit much when you bite into a big one. I tried out a few methods of steaming the bun (a soft bun is essential), none of which were satisfactory. And then? I had a brainwave. I saw a video about spiral-cutting hot dogs. How cool is that method? That’d prevent the curling issue I’d been experiencing. A spiral-cut dog is perfect for holding chunky condiments like relish…waitaminit! What if I turned the toppings into a sort of chunky salsa?
I set to work and suddenly we found ourselves eating the greatest (and least messy) Chicago dogs I’ve ever made. We’ve had them this way three times since then. Y’all, this is a winner. To those of you from the great state of Illinois, I ask your forgiveness for messing with a classic. Don’t hate until you try it, though. I think you’ll really enjoy it.
Better Chicago Dogs
Active time: 25 minutes | Total time: 25 minutes | Serves: 4
Ingredients
4 all-beef hot dogs
4 potato hot dog buns (poppy seed if possible)
1 medium tomato, cored, seeded, and finely diced
1/3 medium cucumber, peeled, seeded, and finely diced
1/4 medium white onion, finely diced
1 dill pickle (or 3 baby dills), finely diced
2 sport peppers, finely diced (optional)
1/8 teaspoon celery salt
mustard, for serving (and ketchup, if you don’t mind being noncanonical)
cooking spray
Instructions
- For the relish: Combine tomato, cucumber, onion, pickle, sport peppers (if using), and celery salt in a glass bowl.
- For the dogs: On a cutting board, lay a hot dog front of you, parallel to the long edge of the board. Position your knife on top at a slight angle. Slowly and carefully rotate the hot dog, cutting about halfway through in a spiral. [For a video of this preparation process, visit Chow, but note that it’s just as easy to do it without the skewer if you hold your knife in the same place (height, angle) while turning the dog.] Repeat for remaining hot dogs. Heat a medium skillet over medium, coat with cooking spray, and cook dogs until warmed through and slightly charred on exterior, about five minutes, turning often.
- To assemble: Wet two paper towels and then wring out any excess water. Wrap two buns in one damp paper towels, set on a plate, and microwave 30 seconds to steam. Repeat with remaining buns and paper towel. In each steamed bun, place one cooked spiral-cut hot dog, a stripe of mustard (and ketchup, if using), and one-quarter the Chicago Dog salsa.
So, listen. Heather will probably post some recipes on this site that require dedication, skill, and a certain amount of culinary prowess. Hers will be the recipes of a woman who practically grew up in the kitchen. One who, taught by a master cook, constantly challenges her palate and her skill set, always combining fresh and exotic ingredients into uniquely nutritious, flavorful, unforgettable dishes.
The recipes I post will be the recipes of a man who has to fend for himself while that woman is out.
My recipes will be delicious and healthy, but always very easy to prepare. Knowing your way around the kitchen will be helpful, but not required. If you can boil water and chop vegetables without chopping your fingers, you’ll be safe with me. To that end, I give you …
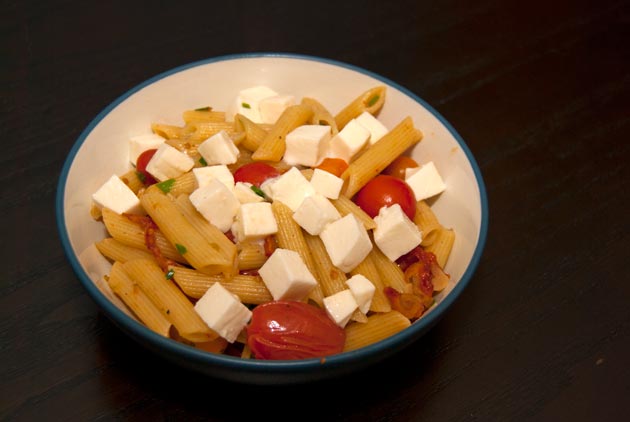
Penne with Two Tomatoes & Mozzarella
Active time: 15 minutes | Total time: 20 minutes | Serves: 4
Adapted from: Everyday Food
Ingredients
3/4 pound penne rigate
1 pint grape or cherry tomatoes
1/2 cup thinly sliced sun-dried tomatoes
6 ounces fresh mozzarella
1/4 cup chopped chives
1 tablespoon olive oil
2 cloves garlic (sliced thin)
salt and fresh ground pepper
Instructions
If you want to save a little prep time up front, slice your sun-dried tomatoes, chives, and garlic ahead of time. This is not critical, as you can easily do it while your pasta is cooking, but if you don’t trust yourself to focus on two tasks at once, this may save you some stress. Otherwise, just follow the steps below.
- Put the mozzarella in the freezer so it gets cold, firm, and easier to slice. While that’s chilling, fill a big pot with water and set to boil. Once the water reaches a nice, rolling boil, add dash of salt and the penne. Cook until al dente (7 to 8 minutes). Scoop out 1/2 cup of the pasta water, then drain the pasta and set it aside.
- Meanwhile, rinse your tomatoes, slice the garlic, chop the chives, and cut the mozzarella into approximately half-inch cubes. How small you chop the chives is up to you, but I prefer them small so that they can get all over the pasta. Put your pot back on the stove over medium heat, then combine the olive oil, pasta water, both kinds of tomatoes, and garlic. Cook until the tomatoes get soft and their skins begin to split—2 to 4 minutes—stirring occasionally.
- Add the pasta, chives, salt, and pepper (to taste). Stir everything around until its all evenly distributed. Serve hot, sprinkling the mozzarella cubes on top last.
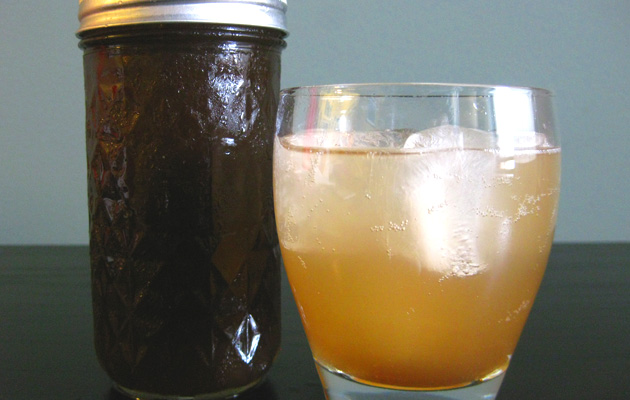 In my childhood home, there were always three sodas: caffeine-free Coke, root beer, and ginger ale (preferable Canada Dry). My Papa and my brother were the real soda drinkers, but given those options, I usually gravitated toward the ginger ale. As I got older, I learned that most canned ginger ale is a lot tamer than many bottled varieties, and my allegiance lay with Reed’s Extra Ginger Brew. I like the burn, friends. I like a ginger ale that doesn’t just politely ring your doorbell but instead bashes in your front door, shakes the rain off its coat, and leaves muddy footprints in the entryway. That’s a soda I know I can bro down with—not just a delicately flavored vehicle for sugar and empty calories, but a soda that feels like a full-bodied treat, loaded with nuance and spice.
I bought a SodaStream Fountain Jet a year ago and it has been one of the greatest gadgets to enter my kitchen. We keep three bottles of water cold in the fridge so they can be fizzed (or “bubbed,” as we say in this house) at a moment’s notice. I’ve always preferred sparkling water, and now I can have it whenever I want. What’s more, I can make better-for-you fancy drinks. Mike’s personal favorite is to take citrus juice (either orange or grapefruit) and cut it with bubbled water. I like to drink the sparkling stuff with a few dashes of rhubarb or cherry bitters, which makes something akin to those “scented” waters and makes any table more elegant. And yet, the drink that impresses my guests the most is always homemade soda. I whipped up a natural cola once that tasted great (though was better as a mixer), but the real star in our joint is this ginger ale. We’re the sort of folks who have milk, water, and grapefruit juice on hand…and that’s it. But with the SodaSream, we now have beverage options, and a jar of this soda syrup tucked into the fridge makes it easy to pull out something delicious and unusual for whomever comes by.
I might’ve forgot to mention that it’s super simple. The “hardest” part is peeling the ginger, which is more time-consuming than actually difficult, and I’m not even truly convinced you need to do that (Update: You definitely do not. See below!). I brought four jars of this syrup to a BK Swappers event last week (along with some whole-grain mustard—another experiment!), and it was gone in a flash. Since my double batch was all traded away, I came home and made a third batch just for us. If you’ve never made your own soda syrup, I’d encourage you to try for several reasons:
- You know exactly what goes into it. Look at the ingredient list on a typical can of soda. Spooky, right? This soda contains ordinary ingredients found in my kitchen. To wit: white sugar, brown sugar, fresh ginger, cardamom pods, allspice berries, peppercorns, and star anise. That’s it. I feel better knowing that my treats are made from whole foods that can be traced more easily to their sources (and that I can pronounce).
- You don’t have to have any special equipment. You can just use seltzer from the store to mix with your syrup (though if you’re the sort of person who buys flats of seltzer from Costco, I’d recommend exploring the SodaStream. Better for the environment, better for you, and so dang much fun).
- You can use the syrup for more than just sodas. We use the ginger ale syrup in desserts, too (it pairs beautifully with apples and pears). I’ve drizzled it on ice cream, and I stir it into mocktails and cocktails. Check out the notes in the recipe for some usage tips!
- It’s almost shockingly easy. Beyond
peeling andslicing the ginger, it’s a matter of heating up some spices on the stovetop and then tossing in the ginger, water, and sugar. You let it simmer for a while, then strain. That’s it. - You can customize the level of sweetness in your beverage. More often than not, I make half-strength ginger ale for myself, using less syrup in my glass of bubbly. This is a great way to wean yourself off of commercial (read: high-sugar, chemical-laden) soft drinks if you’re an avid soda drinker.
- It makes your house smell out of this world.
Now that fall is almost upon us, why don’t you give real ginger ale a try? I think you might like it.
Spicy Ginger Ale Syrup
Active time: 15 minutes | Total time: 1 hour | Makes: approximate 2 cups syrup
Adapted from: Former Chef
Ingredients
1 heaping teaspoon allspice berries
2 heaping teaspoons cardamom pods
4 star anise pods
1 heaping teaspoon peppercorns
1 cup brown sugar
1 cup granulated sugar
8 ounces fresh ginger, washed and then cut into thin slices (no need to peel)
2 cups water
Instructions
- In a medium pot, heat allspice, cardamom, anise, and peppercorns over medium-low heat, stirring occasionally, until toasted and fragrant, 5 to 8 minutes.
- Add brown sugar, granulated sugar, ginger, and water to pot. Bring to a boil, then reduce heat to a simmer. Cook 30 minutes. Allow to cool to room temperature.
- Strain through a fine-mesh sieve and refrigerate in an airtight glass container.
Notes:
- To make a regular soda, mix 2 tablespoons of syrup into 10 ounces of soda water.
- For an autumnal treat, combine 6 ounces unfiltered apple cider, 6 ounces soda water, and 1 tablespoon ginger syrup.
- For a pancake topper, stir together equal parts maple syrup and ginger ale syrup. (Optional: Heat on the stove and whisk in a tablespoon or two of salted butter until combined.)
- Pour over ice cream.
- Toss with sliced apples or pears, dot with butter, and bake in a pie crust.
- Shake with rum and lime juice for a cocktail.
- Spoon into hot tea.
- Sweeten whipped cream to top pumpkin pie.
- Stir into Greek yogurt.
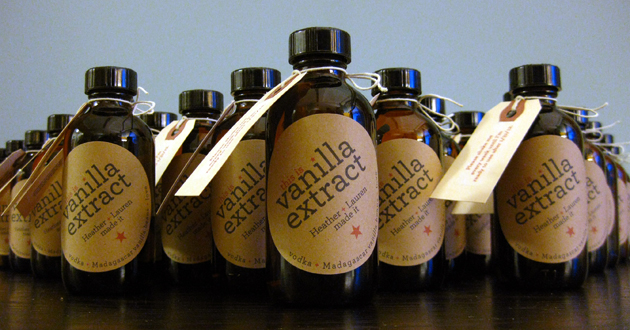 Last year, I asked my food-loving friend Lauren if she’d like to undertake a culinary project with me. When I was small, my family made big-batch gifts all the time—jars and jars of homemade pickles or jam, preserved bounty from our garden, etc.—and often my Papa and Dede make ambitious trios for Christmas presents. One year: chili oil, Worcestershire sauce, raspberry vinegar. Another year: chili powder (Papa smoked the chiles), Herbes de Provence (Dede picked and dried the lavender), curry powder (Papa toasted and ground all the spices). Clearly, this is in my blood, but I live in New York City. Storage space is tight and I live far from at least half the intended recipients. A food gift seemed unmanageable.
Still, the idea of covering all my gifting bases with one project stuck in my craw until I saw a blog post that showed a small child making vanilla extract. You guys, a child. I think we can all agree: I’m not going to be outdone by a four-year-old. Extract is a fantastic project to start out with. It is extremely quick, requires no specialty tools, can be done by small hands (see this blog post to see Annelise, my 4.5-year-old motivator, helping her mom—but don’t store your stash in the window!), requires almost no cleanup, and results in a gift nearly everyone can use in a variety of ways. What’s not to love about vanilla extract? Commercial extract is made by soaking chopped-up vanilla beans in liquid that is at least 35% ABV (usually ethanol). However, sweeteners and colorants are often added, and the quality of the beans is not regulated. Blech. With this project, I could guarantee my friends were getting a quality pantry staple that would make their treats delicious all year long. Even better, when you’ve used about half the bottle, you can add more booze, give it a good shake, and your beans will keep flavoring the extract. It’s like the gift that keeps on giving! Did I mention it was pretty inexpensive? The cost per bottle drops as you make a larger quantity, and if you’re not mailing anything, it’s downright cheap.
Lauren and I set up a date about a month before Christmas (more on that in a minute); in the meantime, I ordered the beans and bottles and whipped up a package design. After quick trips to pick up the booze and buy sticky labels, we were in business. I’d already run all our bottles through the dishwasher to sterilize them, so all we had to do to make the extract is cut up a couple of beans, shove ’em in the bottles, cover them with booze, give ’em a shake, and let ’em sit. That’s it. Really. It took longer to stick our labels on the bottles and tie on the little hang-tags than it did to actually make the goods.
Once you’ve got the bottles sealed, you should shake them every couple of days and let them sit in a cool, dark place for 2 months (I stashed mine in a cardboard box in my closet). Since we’d started a bit late, we just put tags on the bottles that explained both the “don’t use me until” info as well as the “how to replenish the bottle” tip. It worked perfectly! In January, I started getting text messages and emails from friends, saying, “Using the vanilla tonight in some cookies!” Just the other day at work, my executive editor mentioned she’s still enjoying her bottle. I use mine all the time, and every time I do, I get a little flutter of pride that I made it. You, too, can have this distinct pleasure. Even beyond the holidays, it’s great to have a few bottles of extract sitting around so I can give them as impromptu gifts, so I’d recommend tripling the recipe below (at the very least: Lauren and I made 40 bottles). Won’t you give it a try?
Homemade Vanilla Extract
Active time: 10 minutes | Total time: 2 months + 10 minutes | Makes: 8 ounces
Ingredients
4 vanilla beans
8 ounces vodka or Bourbon
Instructions
- Sterilize an 8-ounce glass canning jar and lid (or two 4-ounce glass bottles) by boiling in a large pot of hot water for 10 minutes or running through your dishwasher with the hot-dry setting [see update].
- With a sharp knife, split each vanilla bean lengthwise, trying not to cut all the way through. If you’re using short bottles, cut each bean in half to fit.
- Stuff beans into jar or divide among bottles (the typical recipe is 2 beans per 8 ounces of booze, but I like to make double-concentrated vanilla).
- With a funnel or a small measuring cup, add vodka, making sure to cover beans. Seal jar or bottles. Shake vigorously and let sit in a cool, dark place for 2 months, shaking briefly but vigorously every few days.
Notes:
- This recipe can be made in multiples, no problem. We made 40 bottles at once! Just do some basic math to sort out your ingredients. For 40 4-ounce bottles, we bought a 1-pound bag of beans and 4.5 liters of vodka. Note that your number of beans may vary, as produce never weighs the same, universally, due to size, water content, etc. For me, we got about 80 beans in a one-pound bag. You may find you get more/less depending on the variety of beans you buy, the supplier, etc.
- Some people make the vanilla in one big canning jar (say, a quart or larger) and then, once the beans have released all their delicious flavor after 2 months, they transfer it to smaller bottles for gifting. This works fine, but it means your recipients can’t make more vanilla in their own bottles. You, however, can make another batch using those beans that are still in your big jar. You must do what you think is right, of course.
- If you take your time to make your vanilla, just include a note on the bottle saying when it’ll be ready to use!
- UPDATE: My awesome friend Dora just made vanilla based on this post. The lids on her bottle caps had paper liners inside and when she washed the lids, the paper began to peel. She boiled the lids extra long so she could peel out all the paper and glue. I did not sterilize my lids, I think, because I did not encounter this. The paper liners in some tiny bottle lids help them stay watertight, so if you have paper lids in yours you may want to just rinse them briefly and trust they’re clean, since they came from the manufacturer. Sterilize canning jar lids and others without paper liners in the normal way.
Bottles: Amber Boston Round (4 oz.) with Standard Cap from Specialty Bottle
Beans: Madagascar Vanilla Beans from Beanilla
Booze: Vodka, though Bourbon also works well. Note that vodka bakes off cleanly, whereas Bourbon leaves behind its own flavor footprint in your baked good, delicious in its own right. It’s best to avoid the crappiest vodka, but you don’t need to go crazy. We bought Wódka Vodka, which is generally well-reviewed and has a great price point.
Labels: We used these 2.5″ round kraft labels from Avery (22808), but you can use anything you like. One note is that printing them on a photocopier or with a laser printer is better than using an inkjet, because inkjet stickers will bleed if grabbed with wet hands.
A note about shipping: It is illegal to mail alcohol through the USPS. I’m definitely not telling you to do it. But if you mail yours through other carriers (or just break the law), make sure you wrap your vanilla in several layers of bubble wrap and they should survive the trip without worry. These 4x4x6 corrugated boxes from Uline fit those 4-ounce bottles perfectly, once I’d bundled them in several layers of small bubble wrap.
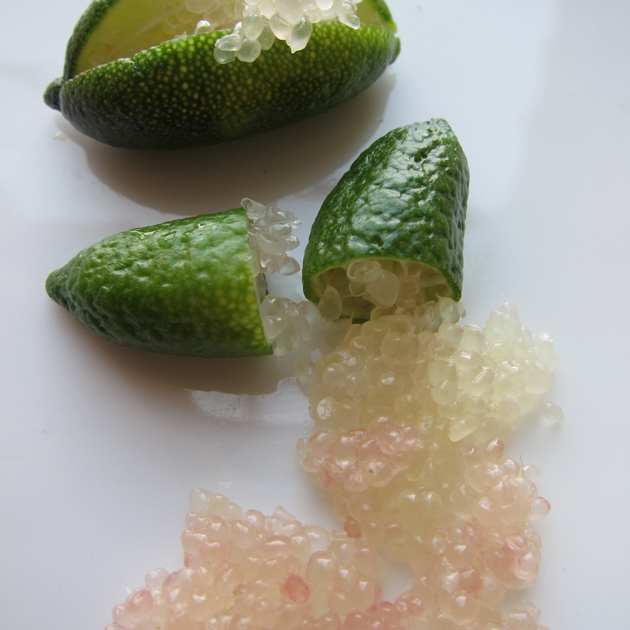
Last year, my Papa sent me a surprise package of goods, unbeknownst to me. He’s the kind of guy who does that, you know? I opened a nondescript box and out tumbled these curious green objects. What on earth were they? I did some googling and figured out he’d sent me finger limes, a microcitrus from Australia (not a true lime at all, actually). This wild fruit has only been cultivated commercially in the last couple decades and only within the last few years have they really come to the U.S. In the last couple years, a farm in California has been growing and selling them from trees they imported. And friends? They are delicious! They taste a bit like a lemon-lime combo with a slightly floral note. And they’re fun as hell.
I used up my last batch straight away by putting them on Thai food and in yogurt, and then I made a batch of finger lime curd. It’s finger lime season again (typically runs from September through February, in the U.S.), so I told some coworkers about them. We got the fine folks at Shanley Farms to send us a couple packages to review on the blog, and I was positively swimming in these gherkin-lookin’ cuties. After giving away handful after handful for friends to experiment, I still had plenty to make a batch of finger lime curd. I improved on the version I made last time by waiting to add the vesicles till the curd was cool (in the hot curd, they burst). Today, we enjoyed it at the office spread on graham crackers, which makes a snack reminiscent of key lime pie, but I think I prefer the curd spread on a slice of soft baguette so you can really experience those bursty little “citrus caviar.” You can buy packages of finger limes from Shanley Farms online, and though they seem expensive, one small packet is enough to make this curd or garnish several dishes. Food experiments, friends!
Finger Lime Curd
Active time: 30 minutes | Total time: 1 hr 30 minutes | Makes: 10 ounces
Ingredients
200 grams / 7 ounces granulated sugar (just shy of 1 cup)
4 tablespoons unsalted butter
2 eggs, beaten
3.5 ounces lime juice (from about 3 limes)
1/4 cup finger lime vesicles (from about 12 finger limes)
Instructions
- With a fine microplane grater, grate 1 teaspoon zest from the finger limes.
- In a saucepan, whisk together eggs, sugar, zest, and lime juice. Cook over low, whisking frequently, until thickened, 20 to 22 minutes. Stir in butter and transfer to a glass bowl. Cover with plastic, pressing plastic directly against curd. Refrigerate 1 hour.
- Stir in finger lime vesicles and refrigerate (up to 1 week). Serve on crackers, baguette, cookies, ice cream, or stirred into yogurt.
Note: You can make this curd with regular limes, too. Just increase the zest to 2 teaspoons and use 4 ounces lime juice.




 Subscribe!