Last year, when I got a SodaStream, I started mixing various juices with seltzer to make fruity spritzers. A favorite in this house is equal parts apple cider and seltzer with a couple spoonfuls of ginger ale syrup. It’s autumn in a glass.
But I’m fussy about my fruits; I won’t eat apples out of season. As soon as the trees stop producing, I cut off my daily apple consumption, and that includes putting the kibosh on buying jugs of cider. I really make the most of my fall cider purchases, and I once experimented with cooking it down to make a syrup for Saturday-morning pancakes. I had some leftover and I stirred it into soda water. What wizardry had I unlocked?
Nothing my ancestors hadn’t already well-documented, it turns out, but it’s a treasure all the same. It turns out that Colonial New Englanders—no slouches in the department of preserving the harvest—knew exactly how to extend the delicious, tangy joy of cider so that it could last year-round. By cooking cider down, reducing it to one-seventh its original volume, you concentrate the sugars, capture the sweet-tart nature of the juice, and make something that lasts at least a year if refrigerated (though I’m sure our Colonial predecessors didn’t worry about that last part). With apples being as plentiful as they were, boiled cider was one of the cheapest sweeteners available (not to mention the tastiest).
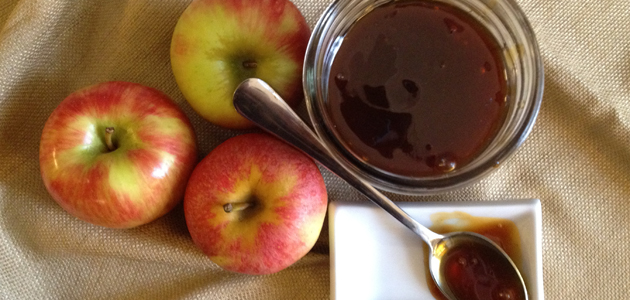
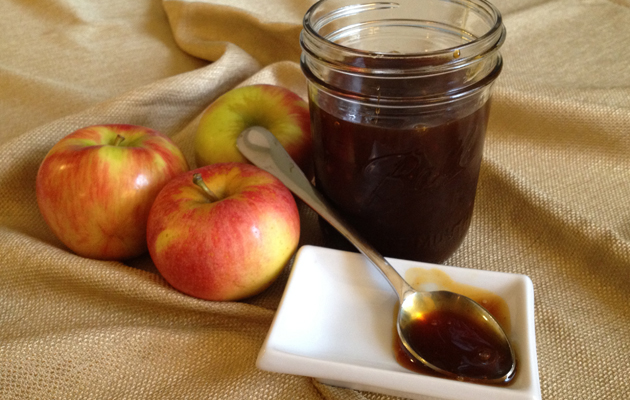
This recipe falls in the “set it and forget it” category. It involves no complicated appliances, only a single ingredient, and nothing but a little time in the house. Simply put, boiled cider (or apple cider molasses, or cider syrup) is fresh apple cider that is cooked down until thick and syrupy. That’s it. There’s no trick to it, it’s just a simple trick.
Now, why would you want to do this? Aside from the fact that it makes your house smell incredible (and seriously, I mean incredible), the resulting syrup has a number of applications both savory and sweet.
- Stir it into seltzer for an awesome soda treat long after the apple harvest (apple soda in May!).
- Add it to boiling water to make hot cider after a long wintry walk.
- Brush it on raw bacon strips and roast for a candied bacon that’s out of this world.
- Mix it into the dough for baked goods, like scones, cake, and donuts, to add cider flavor and cut refined sugar.
- Toss apples with it to bake in a pie. If you want to blow someone’s balls off with the awesome appletude of your pie, do this. Trust me.
- Warm it and drizzle it over ice cream (pumpkin ice cream is a particular treat).
- Add a bit to your baked beans.
- Swirl it in your morning oatmeal or yogurt.
- Glaze roasted squash or carrots.
- Whisk it into a vinaigrette.
- Put it on pancakes in place of maple syrup.
- Spread it on buttered toast.
- Make a PB & boiled cider sandwich. Vow to never use ordinary jelly again.
- Glaze ham or chicken.
- Add some to a gravy for pork.
- Stir into hot tea.
- Add to cocktails (rum, whiskey, brandy).
- Use it to make BBQ sauce.
- Stir it into cream cheese and put it on a bagel or a slice of pumpkin bread.
Are you excited yet?
Boiled Cider / Apple Cider Molasses / Cider Syrup
Active time: 10 minutes | Total time: 3 1/2 to 5 hours | Yield: approximately 2 1/4 cups
Ingredients
1 gallon fresh apple cider
Instructions
- In a clean, nonreactive pot, add 2 1/4 cups cider. Stick a skewer into liquid and mark the height by drawing on skewer with a pen or wrapping it with a rubber band. This will be the way you measure how much the cider has reduced (2 1/4 cups is approximately 1/7 of a gallon). Add the rest of the cider and heat over medium-high. (If desired, add spices at this time.) After 30 to 45 minutes, use a spoon to skim off any foam around the edges.
- Keep cider at a rapid simmer for 3 1/2 to 5 hours. Every hour, stick a second, clean skewer in the pot, take note of the height of the liquid and compare it to your marked skewer.
- When the level of cider is near the mark on your skewer, stir every 5 to 10 minutes, making sure liquid does not bubble over. When it has reduced to 1/7 original volume (it should coat the back of a spoon and be the consistency of warm maple syrup), remove from heat and pour into a clean glass jar (if you wish, strain it through a fine-mesh sieve first). Let cool to room temperature, seal, and refrigerate, up to 1 year.
A note about spices: Traditionally, boiled cider is made without any additional flavorings, as spices can muddy the flavor and also turn the syrup an unsightly color during the long cook time. If you want to add spices, try 1 cinnamon stick, 9 peppercorns, a few allspice berries, 2 whole cloves. Remove spices after 2 hours to prevent overconcentrating their flavor.
A note about reducing too much: If you boil your syrup too long, don’t panic. Apples contain a ton of pectin, which is what makes fruit jell, so if you overboil your syrup you just get cider jelly! You can either keep it that way (and usually, I do—the applications for the jelly are almost identical to the regular, more liquidy boiled cider, and it’s even better for putting on bread or PB sandos) or add a little water and thin it back out a tad.

The other day, I posted this on Facebook: Fact: Taco salad is the best salad. Not a single person dissented; many agreed quite vocally. Seriously, what’s not to love? Taco salad can feel somewhat virtuous (though frequently it’s far from it), it’s a little more kicky than your usual garden greens, and it’s fairly customizable. One complaint I often hear about eating salad for lunch is that you wind up hungry by 3pm. Not so with a taco salad! There’s so much happening in there, so many good, filling ingredients, that you’ll be satisfied till supper.
When I was growing up, we’d often have taco salad for dinner. Matthew and I loved this meal and happily ate it out of an enormous salad bowl in which Papa tossed everything together, but if you have fussy little ones, it’s easy to do individual plates of taco salad, omitting the undesirable ingredients as needed. Feeding a crowd? For heaven’s sake, make a taco salad! I’ve yet to meet a person who was not delighted by the appearance of a bowl of these Mexi-ish greens.
I was a vegetarian for about half my life, so I typically make this salad without any meat, but you can add in whatever you like. My Papa used to cook up seasoned ground beef to toss in, and if I like to make Mike really happy, I’ll sometimes grill up a marinated chicken breast to shred. But even without meat, it’s plenty filling and quick to make. Perhaps best of all, you can pack it for lunch (even pack it days before) and have the best lunch ever at the office. Below is my recipe to feed a family of four, but below the main recipe I have included tips and quantities for making two lunch-size portions (and how to pack them). I usually prep 2 dinner salads in big bowls and make leftover lunch salads at the same time with the full 4-serving quantities.
Basic Taco Salad
Active time: 20 minutes | Total time: 20 minutes | Serves: 4
Ingredients
6 tablespoons sour cream
6 tablespoons fresh salsa
3 tablespoons chili sauce (we like Heinz)
1/2 teaspoon chili powder
1/4 teaspoon cumin
1/4 teaspoon onion powder
Tabasco Green Jalapeño Pepper Sauce
Salt and pepper
12 to 16 ounces romaine lettuce, chopped
2 cans (15.5 ounces each) black or small pink beans (pinquitos), rinsed and drained
1 pint grape or cherry tomatoes, halved (or 2 medium tomatoes, diced)
kernels from 2 cobs of corn (or 1 1/2 cups frozen corn kernels, thawed)
1 large bell pepper, diced
4 scallions, sliced (or 1/2 white onion, diced)
1 1/2 cups shredded cheddar, Colby Jack, or Monterey Jack cheese (6 ounces)
4 handfuls tortilla chips, lightly crushed into bite-size pieces
cooked taco meat or shredded cooked chicken breast, diced avocado, sliced black olives, cilantro leaves, toasted pepitas (optional)
Instructions
- In a small bowl, stir together sour cream, salsa, chili sauce, cumin, and onion powder. Season to taste with Tabasco, salt, and pepper.
- In a large bowl, toss together lettuce, beans, tomatoes, corn, bell pepper, scallions, cheese, and dressing (along with any optional mix-ins). Divide among four plates and top with crushed chips.
For two lunch servings (note reduced quantities):
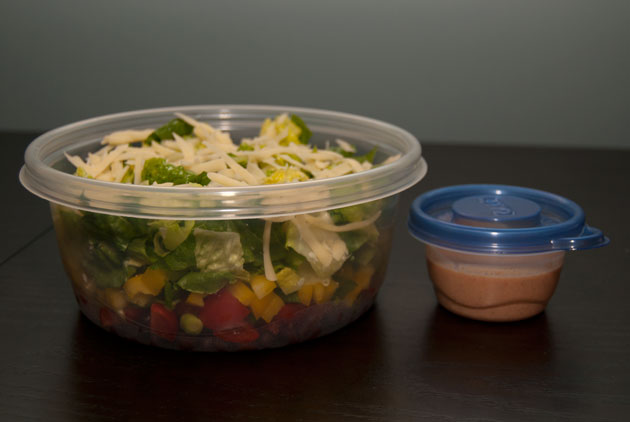
In a small bowl, stir together 3 tablespoons sour cream; 3 tablespoons fresh salsa; 1.5 tablespoons chili sauce; 1/4 teaspoon chili powder; 1/8 teaspoon cumin; and 1/8 teaspoon onion powder. Season with Tabasco Green Jalapeño Pepper Sauce, salt, and pepper to taste. Divide the dressing between two 4- or 6-cup storage containers with tight-fitting lids (we use yogurt tubs). Splitting quantities between the two containers, layer the following items in this order to prevent sogginess: a handful of diced tomatoes (about 6 grape tomatoes per container); 1 can of black beans, rinsed and drained; kernels from 1 cob of corn (or 3/4 cup frozen corn kernels, thawed); 1/2 yellow bell pepper, diced; 2 scallions, sliced; 1/2 pound romaine lettuce, shredded (about 4 handfuls per container); 3/4 cup shredded cheese (3 ounces). Cheese always goes on top! In a small bag, pack a handful of chips (don’t worry about them getting crushed; you’ll be crushing them shortly anyway). Refrigerate. At lunchtime, shake like the dickens or toss in a bowl with crumbled chips. Enjoy the envious stares. [Note: The photo below shows the dressing kept separate, which you can also do. I just don’t have tiny containers like that anymore and I learned it’ll do fine in the base of your 4-cup container!]
Notes:
- You can substitute Greek yogurt for the sour cream, if you like.
- If you choose to include avocado in your make-ahead salad (I like to), dice it and toss it with some lime juice, then put it on the very bottom of your lunch container before you add the dressing. The dressing will blanket the avocado to protect it from the oxygen/keep it from browning.
- If you put shredded chicken in your lunch salad, pack it on top of the lettuce, like the cheese (ground meat can go on the bottom).
This is a recipe I knew before I met Heather and, had she not been a strict vegetarian at the time, one that I no doubt would have made to woo her. It’s delicious, impressive, and very easy to prepare. If you make this for the lady or gentleman of your fancy, it could very well result in after dinner sexytimes. I make no promises, but your odds are definitely improved.
In the past, I have enjoyed this dish on a bed or angel hair pasta (with a simple garlic butter sauce), but it plays well with a myriad sides. Last night, I served it with my roasted broccoli, but it also goes very well with roasted brussels sprouts, steamed or sautéed green beans, peas, mashed potatoes, or any combination thereof. Note that I have made the recipe for two, but it scales up perfectly to serve however many people you prefer.
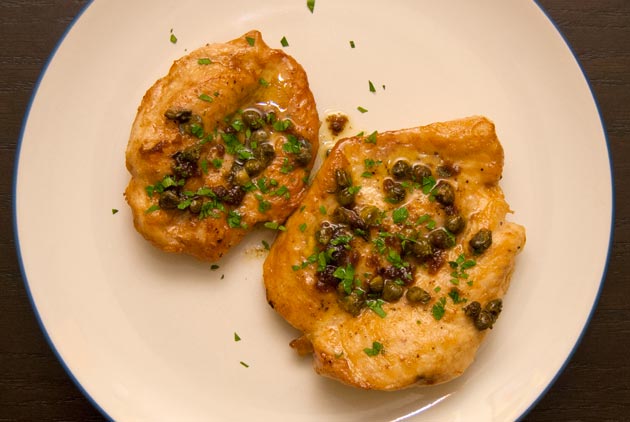
Chicken Piccata
Active time: 20 minutes | Total time: 20 minutes | Serves: 2
Ingredients
1 boneless, skinless chicken breast, halved horizontally (to make two thinner fillets)
1/4 cup all-purpose flour
salt and fresh ground pepper
3 tablespoons unsalted butter
2 1/2 tablespoons extra-virgin olive oil
1/4 cup chicken broth
1 lemon, juiced (about 2 tablespoons)
2 1/2 tablespoons brined capers, rinsed and drained
2 1/2 tablespoons fresh parsley, chopped (this is mostly garnish, so chop more or less to taste)
Instructions
- Season the chicken filets with salt and pepper (both sides) and dredge them in flour. Shake them off, but don’t go nuts; that extra flour will come in handy later when you scrape the pan to make the sauce.
- Add 1 tbsp of butter and 1 1/2 tbsp of olive oil to a large skillet over medium heat. When it starts to sizzle, add the chicken, cooking each side for about 3 minutes. Remove and set aside.
- Add the chicken broth, lemon juice, and capers. Bring to a boil, stirring and scraping the pan to get all of those nice, flavorful brown crispy bits. Put the chicken back in the pan, then reduce the heat and let everything simmer for about 5 minutes.
- By now the chicken should be a nice golden brown and everything should smell capery and buttery and awesome. Plate the chicken, then add the remaining butter to the pan. Scrape it around again and whisk everything together until it begins to thicken. Pour the sauce over the chicken, sprinkle the parsley on top, and serve.
Notes
- Get the most juice from your lemon by microwaving it for about 20 seconds. Then, roll it on the counter until it is noticeably softer. This helps burst the the little juice cells inside which makes the juicing easier and yields the most liquid.
- You a regular skillet (vs. non-stick). Otherwise, you won’t get those brown crispy bits that add extra flavor. Don’t worry; because of the oil and butter, the meat sticking to the pan is not an issue.
- Because we’re dealing with hot oil, butter, and chicken juices, I like to use a splatter screen. Of course this is totally optional, but I am a kitchen neatnik and mine has served me very well.
 Confession: Hot dogs are directly responsible for me quitting vegetarianism after more than 15 years. You guys, I love hot dogs. My brother, Matthew, and I used to split a package of Lit’l Smokies when we came home from school (for the record, that’s four servings each; it’s a miracle we’re not dead). I like a hot dog off the grill, I like a boiled dog, I like a dog charred in the flames of a campfire, I like sliced dogs stirred into stovetop mac and cheese, I like pigs in a blanket…I even like tofu dogs, but when I was faced with a hot dog at my first Mets game in Shea Stadium, I folded like a cheap suit. Folks at my old magazine caught wind and asked if I’d eat meat for a week and write about it. The rest is history. Sweet sweet sustainably-and-humanely raised animal-eating history.
Truly, I don’t eat much meat these days, particularly red meat, but I just can’t resist a hot dog. That said, I had never known the glory of a Chicago-style dog until I moved East, and once my eyes were opened, they were opened wide. Now, I’m a fan of condiments. The more, the merrier, I say. I like my burgers overflowing with stuff. I’m the guy at Subway who orders a sandwich “with everything. No, seriously, all of it.” A Chicago dog speaks to this innate need for a well-dressed weenie. In the Chicago style, when a beef dog is “dragged through the garden,” it’s placed in a steamed poppyseed bun and topped with yellow mustard, pickle relish, a dill pickle spear, fresh tomato, pickled sport peppers, diced white onions, and celery salt. Sometimes, a cucumber slice or two are added; the occasional inclusion of ketchup is a hotly contested issue. This colorful dressing takes a simple dog and elevates it to a full, colorful meal.
There’s one problem: Chicago dogs are messy, y’all. The tomatoes always end up slapping against my nostrils, the onions fall off, and the sport peppers, when they’re not squirting spicy brine, are torpedoing out the tail end of the bun. We make these babies fairly frequently in our house, so I’ve been tinkering with the method. Boiled dogs are fine, but Mike prefers ’em grilled (“chardog”), so I’d been splitting them in half and slapping them on our Griddler. They curl up like crazy, though, and the charring isn’t that fantastic. I also often eliminate the sport peppers because they’re a bit much when you bite into a big one. I tried out a few methods of steaming the bun (a soft bun is essential), none of which were satisfactory. And then? I had a brainwave. I saw a video about spiral-cutting hot dogs. How cool is that method? That’d prevent the curling issue I’d been experiencing. A spiral-cut dog is perfect for holding chunky condiments like relish…waitaminit! What if I turned the toppings into a sort of chunky salsa?
I set to work and suddenly we found ourselves eating the greatest (and least messy) Chicago dogs I’ve ever made. We’ve had them this way three times since then. Y’all, this is a winner. To those of you from the great state of Illinois, I ask your forgiveness for messing with a classic. Don’t hate until you try it, though. I think you’ll really enjoy it.
Better Chicago Dogs
Active time: 25 minutes | Total time: 25 minutes | Serves: 4
Ingredients
4 all-beef hot dogs
4 potato hot dog buns (poppy seed if possible)
1 medium tomato, cored, seeded, and finely diced
1/3 medium cucumber, peeled, seeded, and finely diced
1/4 medium white onion, finely diced
1 dill pickle (or 3 baby dills), finely diced
2 sport peppers, finely diced (optional)
1/8 teaspoon celery salt
mustard, for serving (and ketchup, if you don’t mind being noncanonical)
cooking spray
Instructions
- For the relish: Combine tomato, cucumber, onion, pickle, sport peppers (if using), and celery salt in a glass bowl.
- For the dogs: On a cutting board, lay a hot dog front of you, parallel to the long edge of the board. Position your knife on top at a slight angle. Slowly and carefully rotate the hot dog, cutting about halfway through in a spiral. [For a video of this preparation process, visit Chow, but note that it’s just as easy to do it without the skewer if you hold your knife in the same place (height, angle) while turning the dog.] Repeat for remaining hot dogs. Heat a medium skillet over medium, coat with cooking spray, and cook dogs until warmed through and slightly charred on exterior, about five minutes, turning often.
- To assemble: Wet two paper towels and then wring out any excess water. Wrap two buns in one damp paper towels, set on a plate, and microwave 30 seconds to steam. Repeat with remaining buns and paper towel. In each steamed bun, place one cooked spiral-cut hot dog, a stripe of mustard (and ketchup, if using), and one-quarter the Chicago Dog salsa.
So, listen. Heather will probably post some recipes on this site that require dedication, skill, and a certain amount of culinary prowess. Hers will be the recipes of a woman who practically grew up in the kitchen. One who, taught by a master cook, constantly challenges her palate and her skill set, always combining fresh and exotic ingredients into uniquely nutritious, flavorful, unforgettable dishes.
The recipes I post will be the recipes of a man who has to fend for himself while that woman is out.
My recipes will be delicious and healthy, but always very easy to prepare. Knowing your way around the kitchen will be helpful, but not required. If you can boil water and chop vegetables without chopping your fingers, you’ll be safe with me. To that end, I give you …
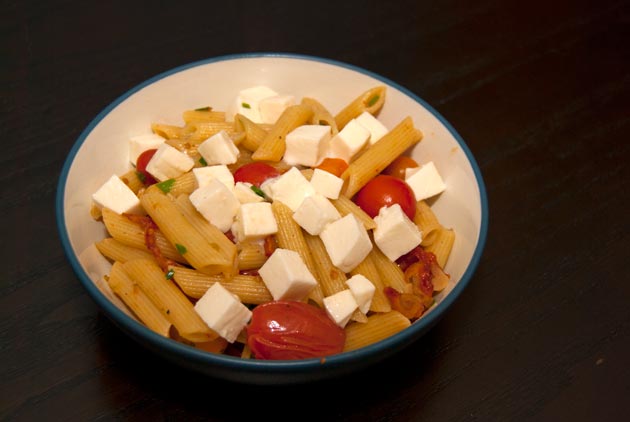
Penne with Two Tomatoes & Mozzarella
Active time: 15 minutes | Total time: 20 minutes | Serves: 4
Adapted from: Everyday Food
Ingredients
3/4 pound penne rigate
1 pint grape or cherry tomatoes
1/2 cup thinly sliced sun-dried tomatoes
6 ounces fresh mozzarella
1/4 cup chopped chives
1 tablespoon olive oil
2 cloves garlic (sliced thin)
salt and fresh ground pepper
Instructions
If you want to save a little prep time up front, slice your sun-dried tomatoes, chives, and garlic ahead of time. This is not critical, as you can easily do it while your pasta is cooking, but if you don’t trust yourself to focus on two tasks at once, this may save you some stress. Otherwise, just follow the steps below.
- Put the mozzarella in the freezer so it gets cold, firm, and easier to slice. While that’s chilling, fill a big pot with water and set to boil. Once the water reaches a nice, rolling boil, add dash of salt and the penne. Cook until al dente (7 to 8 minutes). Scoop out 1/2 cup of the pasta water, then drain the pasta and set it aside.
- Meanwhile, rinse your tomatoes, slice the garlic, chop the chives, and cut the mozzarella into approximately half-inch cubes. How small you chop the chives is up to you, but I prefer them small so that they can get all over the pasta. Put your pot back on the stove over medium heat, then combine the olive oil, pasta water, both kinds of tomatoes, and garlic. Cook until the tomatoes get soft and their skins begin to split—2 to 4 minutes—stirring occasionally.
- Add the pasta, chives, salt, and pepper (to taste). Stir everything around until its all evenly distributed. Serve hot, sprinkling the mozzarella cubes on top last.
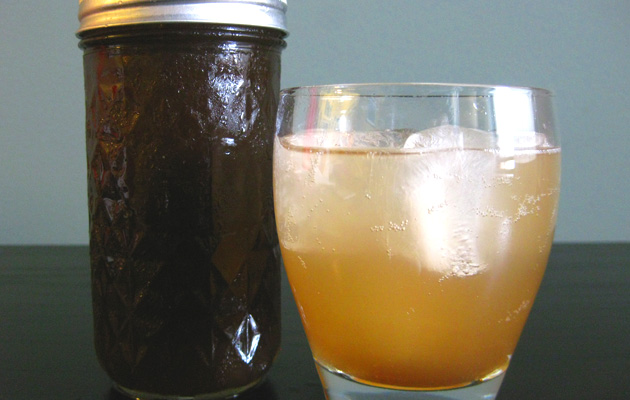 In my childhood home, there were always three sodas: caffeine-free Coke, root beer, and ginger ale (preferable Canada Dry). My Papa and my brother were the real soda drinkers, but given those options, I usually gravitated toward the ginger ale. As I got older, I learned that most canned ginger ale is a lot tamer than many bottled varieties, and my allegiance lay with Reed’s Extra Ginger Brew. I like the burn, friends. I like a ginger ale that doesn’t just politely ring your doorbell but instead bashes in your front door, shakes the rain off its coat, and leaves muddy footprints in the entryway. That’s a soda I know I can bro down with—not just a delicately flavored vehicle for sugar and empty calories, but a soda that feels like a full-bodied treat, loaded with nuance and spice.
I bought a SodaStream Fountain Jet a year ago and it has been one of the greatest gadgets to enter my kitchen. We keep three bottles of water cold in the fridge so they can be fizzed (or “bubbed,” as we say in this house) at a moment’s notice. I’ve always preferred sparkling water, and now I can have it whenever I want. What’s more, I can make better-for-you fancy drinks. Mike’s personal favorite is to take citrus juice (either orange or grapefruit) and cut it with bubbled water. I like to drink the sparkling stuff with a few dashes of rhubarb or cherry bitters, which makes something akin to those “scented” waters and makes any table more elegant. And yet, the drink that impresses my guests the most is always homemade soda. I whipped up a natural cola once that tasted great (though was better as a mixer), but the real star in our joint is this ginger ale. We’re the sort of folks who have milk, water, and grapefruit juice on hand…and that’s it. But with the SodaSream, we now have beverage options, and a jar of this soda syrup tucked into the fridge makes it easy to pull out something delicious and unusual for whomever comes by.
I might’ve forgot to mention that it’s super simple. The “hardest” part is peeling the ginger, which is more time-consuming than actually difficult, and I’m not even truly convinced you need to do that (Update: You definitely do not. See below!). I brought four jars of this syrup to a BK Swappers event last week (along with some whole-grain mustard—another experiment!), and it was gone in a flash. Since my double batch was all traded away, I came home and made a third batch just for us. If you’ve never made your own soda syrup, I’d encourage you to try for several reasons:
- You know exactly what goes into it. Look at the ingredient list on a typical can of soda. Spooky, right? This soda contains ordinary ingredients found in my kitchen. To wit: white sugar, brown sugar, fresh ginger, cardamom pods, allspice berries, peppercorns, and star anise. That’s it. I feel better knowing that my treats are made from whole foods that can be traced more easily to their sources (and that I can pronounce).
- You don’t have to have any special equipment. You can just use seltzer from the store to mix with your syrup (though if you’re the sort of person who buys flats of seltzer from Costco, I’d recommend exploring the SodaStream. Better for the environment, better for you, and so dang much fun).
- You can use the syrup for more than just sodas. We use the ginger ale syrup in desserts, too (it pairs beautifully with apples and pears). I’ve drizzled it on ice cream, and I stir it into mocktails and cocktails. Check out the notes in the recipe for some usage tips!
- It’s almost shockingly easy. Beyond
peeling andslicing the ginger, it’s a matter of heating up some spices on the stovetop and then tossing in the ginger, water, and sugar. You let it simmer for a while, then strain. That’s it. - You can customize the level of sweetness in your beverage. More often than not, I make half-strength ginger ale for myself, using less syrup in my glass of bubbly. This is a great way to wean yourself off of commercial (read: high-sugar, chemical-laden) soft drinks if you’re an avid soda drinker.
- It makes your house smell out of this world.
Now that fall is almost upon us, why don’t you give real ginger ale a try? I think you might like it.
Spicy Ginger Ale Syrup
Active time: 15 minutes | Total time: 1 hour | Makes: approximate 2 cups syrup
Adapted from: Former Chef
Ingredients
1 heaping teaspoon allspice berries
2 heaping teaspoons cardamom pods
4 star anise pods
1 heaping teaspoon peppercorns
1 cup brown sugar
1 cup granulated sugar
8 ounces fresh ginger, washed and then cut into thin slices (no need to peel)
2 cups water
Instructions
- In a medium pot, heat allspice, cardamom, anise, and peppercorns over medium-low heat, stirring occasionally, until toasted and fragrant, 5 to 8 minutes.
- Add brown sugar, granulated sugar, ginger, and water to pot. Bring to a boil, then reduce heat to a simmer. Cook 30 minutes. Allow to cool to room temperature.
- Strain through a fine-mesh sieve and refrigerate in an airtight glass container.
Notes:
- To make a regular soda, mix 2 tablespoons of syrup into 10 ounces of soda water.
- For an autumnal treat, combine 6 ounces unfiltered apple cider, 6 ounces soda water, and 1 tablespoon ginger syrup.
- For a pancake topper, stir together equal parts maple syrup and ginger ale syrup. (Optional: Heat on the stove and whisk in a tablespoon or two of salted butter until combined.)
- Pour over ice cream.
- Toss with sliced apples or pears, dot with butter, and bake in a pie crust.
- Shake with rum and lime juice for a cocktail.
- Spoon into hot tea.
- Sweeten whipped cream to top pumpkin pie.
- Stir into Greek yogurt.


 Subscribe!